Monday, October 26, 2009

Make your own playing card holders


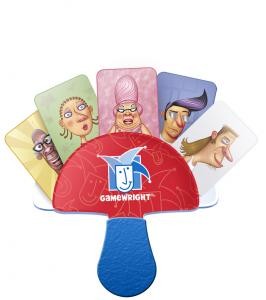
Have you ever seen one of these?


In case you've never seen one, this is a playing card holder.  A very ingenious device!  However just a little too rich for my blood.  If you've been reading my blog for long you will notice a recurring theme.  I AM CHEAP.  Enter exhibit A, my home-made playing card holder. 


Wanna know how?  Here goes... Gather 2 lids (one larger than the other) from old yogurt, cream cheese, sour cream, or butter containers.


You're also going to need a punch set (or something else like an ice-pick that you can make a small hole with).  Like how I store my punch set?  Before you go judging me...I made this a few years ago in attempt to win a contest for scrapbooking storage supply solutions.  Because if you lure me with something free, I will spend inordinate amounts of time and energy in that endeavor.  I actually won the contest (not with this box, though)...and got just what I needed:  more scrapbooking supplies.  This is one of those boxes from Costco that I just recovered with some shabby chic scrapbooking paper, tied some riboon around, and hot glued a silk flower on top.


Back to our regularly scheduled programming....Punch holes in the centers of both of the lids.  There is usually a little raised bump which is helpful in centering.


You're also going to need a brad, decorative is always nice.  See my collection of "pink" scrapping supplies?  Now are you understanding the tongue in cheek above comment about needing more scrapping supplies?


 Place the lids top sides facing each other and attach with a brad.


Give the girls a sheet of stickers and let them have at decorating.  I helped them place a large butterfly to completely cover the back side of the brad.


Oh yes, I just have to mention.  This kind of thing really bugs me.
 

So, if you don't already have some go today and purchase you some 100% acetone.  Don't settle for any of that watered down Sally Hanson junk...get the full monty.


This stuff will take just about ANYTHING off.  I have removed so many labels and repurposed many things thanks to a handy bottle of 100% acetone.  Plus it is REALLY good at getting dark/bright fingernail polish off.


See that?  Like magic!

And there you have it 2 pretty, inexpensive playing card holders...

Front side


Back side


We have been playing a lot of crazy eights in the evenings and I've been wanting to do something like this to help them hold their cards.  Anyway, today Lil' Bit's Saxon math book, of all places, suggested playing a game called "Make Ten".  You play by dealing 7 cards to each player.  You lay out 0, 1, 2, 3, 4, and 5 in a circle and each player tries to make a sum of 10 by laying a card on top of another.  So you wold place an 8 over a 2 or a 6 over a 4, etc..  If you don't have any cards to play you have to take 2 cards from the stack.  The first person to play all of his/her cards is the winner.  It is actually a pretty fun game and it helps retention of those 10 facts.


My girls love playing cards with us, it is fun for all, and I think it is a great way for our family to spend time together.  Go fish!

Friday, October 23, 2009

Layers of the Earth

Associate something to be learned with food and I'm in like flint. I guess my girls got that gene, too. Anyway, we've been learning about the different layers of earth. I did some searching and couldn't find a whole lot that I thought tasted good by way of recipes so I kind of combined some different ideas that I found and made my own recipe. If you're looking for specific measurements/amounts in this post you may want to skip this 'un. Because we're not building a rocket here...just replica earths.

Step 1: Mix a couple of spatula globs of peanut butter, a scoop of graham cracker crumbs, and some powdered sugar to get a playdoh like consistency to your mixture.
Put them in the freezer for a few minutes so that they aren't quite so mushy.
Have you tried this ice-cream? Well, I can barely pull myself to buy Ben & Jerry's because they're so liberal but this ice cream tastes just like my mother's chocolate cake. Mmmmm...

Meanwhile mix up some cream cheese (maybe 1 oz???), a spoonful or 2 of sour cream, and some more, yes, powdered sugar...mmmm (don't you dare dirty another bowl...do it in the same bowl..remember, we're not building rockets)

After your earths have hardened a little take them out, do any necessary reshaping and then cut them in half with a sharp knife.

Scoop out little bits of each half. We used a grapefruit spoon.

Oh yes...eat the leftover pieces.

Spoon in the cream cheese mixture and pop a red hot in one of the 2 halves.

Press the 2 halves back together.


Pop them back in the freezer for a few more minutes.


After they have hardened just a little, take them out, reshape as necessary. Then roll them in graham crax crumbs and sprinkles. We used blue for water.

Voila! There you have it.


Mmmm....good.

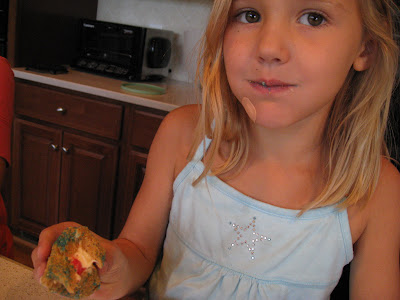
See that yummy cross section?

Discuss with them that the

Red hot = Inner Core
Cream Cheese = Outer Core
Peanut Butter = Mantle
Crumbs and Sprinkles = Crust

Then go here, print one of these, and have them label (without you telling them if they can).

I have to wonder if this might be a little bit how God feels? Boy have I got a mess on my hands!

Monday, October 19, 2009

Brunswick Town

Our trip to Brunswick Town was another great thing! Founded in 1726 this was North Carolina's capital until Governor Tryon built Tryon Palace in New Bern, NC in 1770. The girls' only cousin (their age) was able to go to this with us.


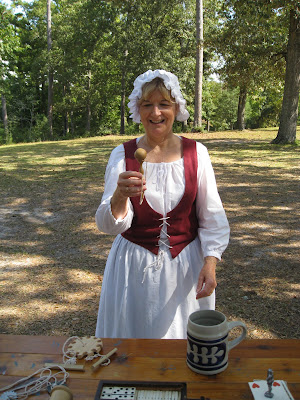
Here are a few games that colonial children played.

Marbles (made out of clay)
Graces

Whirly-gigs


Bilboquette and cup & ball


Jacobs' Ladder...they were all mesmerized by this.


Here they are making butter. How cool is that? Those of you that are doing MFW Adventures know that this couldn't be more fitting. I don't believe that the JIF containers were exactly "period".

This one is, though

He explained about all of the different types of cooking and eating utensils. Anything that was ceramic was called "Sad-ware" because if it fell it usually broke on the brick floors. They usually used wooden bowls (like the one he is pointing at) to avoid them being broken. We actually got one of these from my husband's grandmother. I don't know HOW old it is but I think it is neat to realize why it was preferred.


Here he is showing us the types of forks and knives that were used. The knife was very broad (and I don't believe very sharp) because they actually ate off of it instead of the fork.


This man was dressed as a British Loyalist that recruited for the royal army. Here he is showing a replica of Colonial currency.

The girls got to make their own hand dipped candles.


The final product


And then we got in our air conditioned car and drove home!