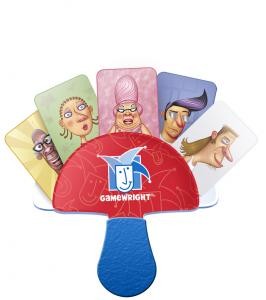
Have you ever seen one of these?
Wanna know how? Here goes... Gather 2 lids (one larger than the other) from old yogurt, cream cheese, sour cream, or butter containers.
You're also going to need a punch set (or something else like an ice-pick that you can make a small hole with). Like how I store my punch set? Before you go judging me...I made this a few years ago in attempt to win a contest for scrapbooking storage supply solutions. Because if you lure me with something free, I will spend inordinate amounts of time and energy in that endeavor. I actually won the contest (not with this box, though)...and got just what I needed: more scrapbooking supplies. This is one of those boxes from Costco that I just recovered with some shabby chic scrapbooking paper, tied some riboon around, and hot glued a silk flower on top.
Back to our regularly scheduled programming....Punch holes in the centers of both of the lids. There is usually a little raised bump which is helpful in centering.
You're also going to need a brad, decorative is always nice. See my collection of "pink" scrapping supplies? Now are you understanding the tongue in cheek above comment about needing more scrapping supplies?
Place the lids top sides facing each other and attach with a brad.
Give the girls a sheet of stickers and let them have at decorating. I helped them place a large butterfly to completely cover the back side of the brad.
Oh yes, I just have to mention. This kind of thing really bugs me.
So, if you don't already have some go today and purchase you some 100% acetone. Don't settle for any of that watered down Sally Hanson junk...get the full monty.
This stuff will take just about ANYTHING off. I have removed so many labels and repurposed many things thanks to a handy bottle of 100% acetone. Plus it is REALLY good at getting dark/bright fingernail polish off.
And there you have it 2 pretty, inexpensive playing card holders...
Front side
Back side
We have been playing a lot of crazy eights in the evenings and I've been wanting to do something like this to help them hold their cards. Anyway, today Lil' Bit's Saxon math book, of all places, suggested playing a game called "Make Ten". You play by dealing 7 cards to each player. You lay out 0, 1, 2, 3, 4, and 5 in a circle and each player tries to make a sum of 10 by laying a card on top of another. So you wold place an 8 over a 2 or a 6 over a 4, etc.. If you don't have any cards to play you have to take 2 cards from the stack. The first person to play all of his/her cards is the winner. It is actually a pretty fun game and it helps retention of those 10 facts.


3 comments:
What a great idea!!!!! I have some of these card holders but kept thinking..man I am going to have to buy another one and another one.. and if a friend comes over.... This is great!
That is genius and my son will thank you for it!
I'm making one tomorrow :)
Thanks!
Great, great, great idea! I've seen those so many times at the store, but I refuse to pay the price, too. ;) My 3 year old could really use one.
Thanks so much. :) Ami
www.walkingbytheway.com
Post a Comment